Rigging a Planer and Bridle System for Slow-Speed Trolling
The standard planer setup already on this site covers the basics: tie a planer in-line, run a leader off the back, get a bait down where wahoo, tuna, and kings actually feed. What it only touches on briefly is the bridle — the piece that turns a planer from something you fight and hand-line at the rail into something you reel calmly to the rod tip like anything else on the boat. Here’s the whole system, piece by piece, with what to actually buy and how it goes together.
What a planer and bridle system actually is
A basic direct-tie planer rig ties your main line straight to the planer’s tow ring and a leader straight to its blade ring — simple, and it works. The problem shows up at the boat: the planer itself is too bulky and rigid to pass through a rod’s guides, so once it’s reeled close, you’re either cleating off the main line and hand-lining the last stretch, or wrestling the planer over the gunwale by hand while it’s still under load. Neither is fun with a green fish attached.
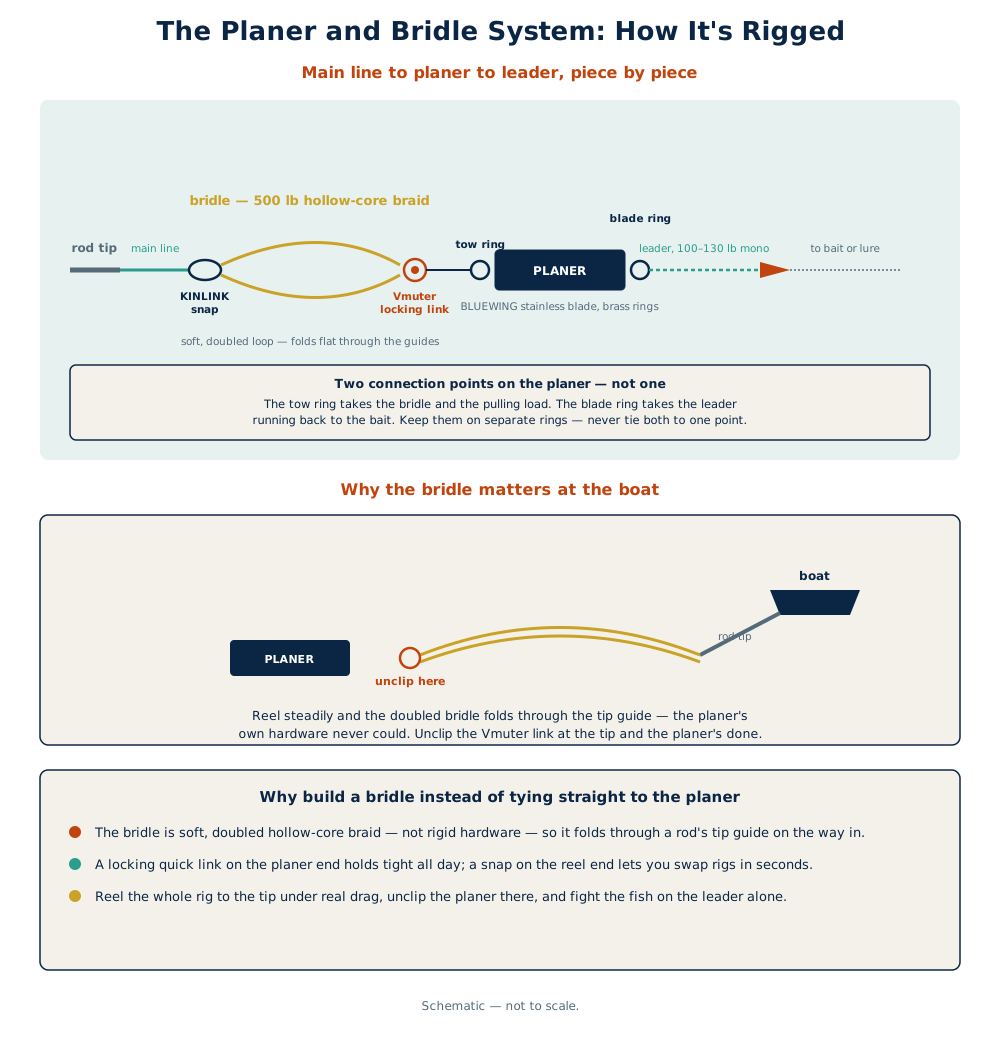
A bridle solves that by putting a short loop of soft, doubled line between the main line and the planer’s tow ring instead of a direct tie. Because that loop is supple — not a rigid metal ring — it can pass through a large rod tip guide, which means the whole rig, planer included, comes all the way to the rod tip under real drag. No cleat, no hand-lining. When the connector at the planer end reaches the tip, you unclip it in one motion and the planer’s out of the fight entirely.
What that one deep bait actually does
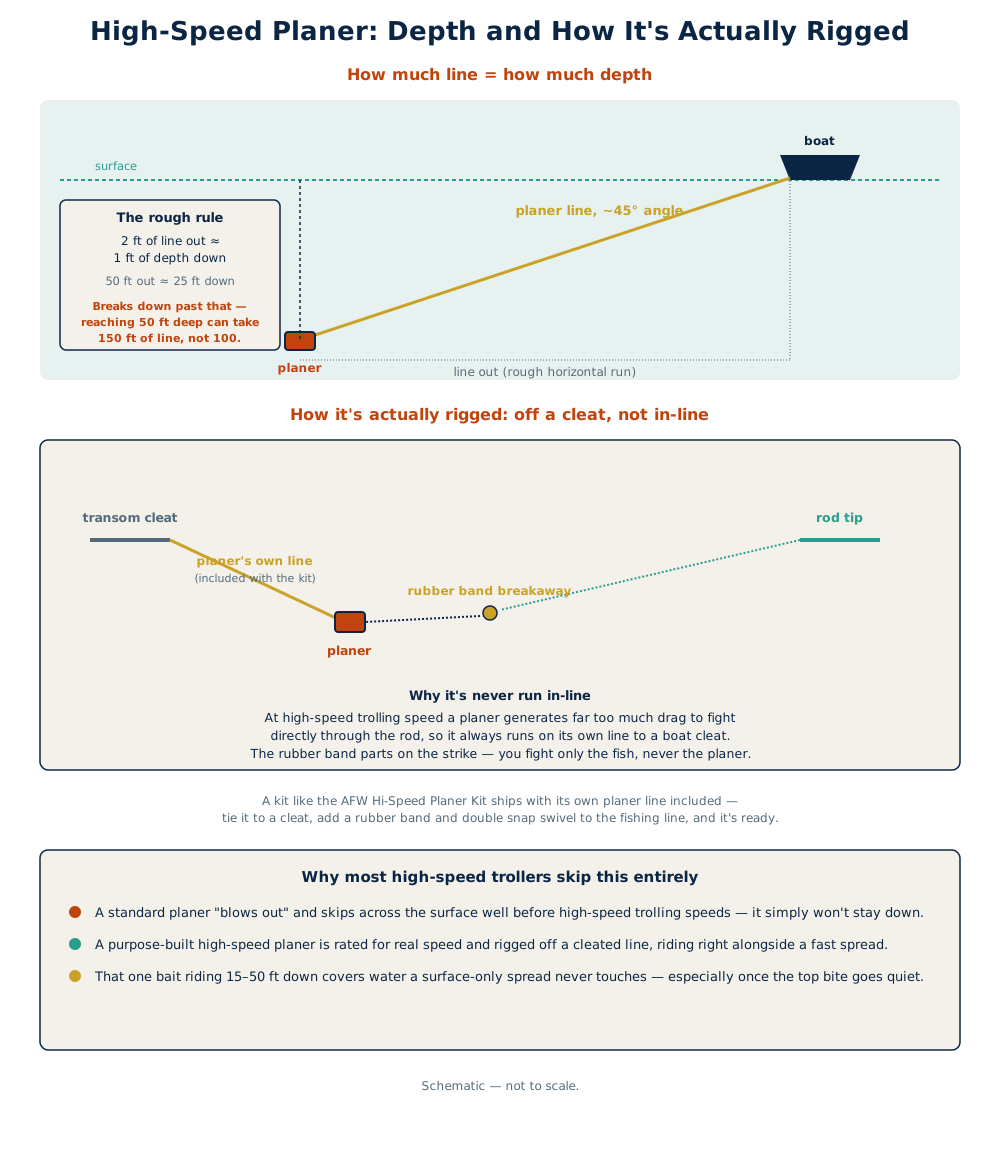
Everything the standard planer article says about depth still applies here: a planer takes a bait out of the surface spread and holds it 15 to 40+ feet down depending on size, speed, and line out, which is where wahoo, tuna, and kings spend most of a slow-trolling day. Run our planer depth calculator for a number specific to your setup — this article is about building the rig cleanly, not re-deriving the depth math.
The parts, and what each one actually does
A proper bridle system is four pieces working together, not just a planer with a rope tied to it:
The planer. The BLUEWING trolling planer — a 316 stainless steel blade with brass connecting rings — runs $16.99 to $39.99 depending on size, from a #2 (2 oz) up through a #16 (up to 32 oz). Main line ties to the large brass tow ring; the leader ties to the blade’s own ring. Bigger sizes and more line out ride deeper, the same as any inline planer.
The bridle. The Tackle Room Fishing Planer Bridle is a 24-inch loop hand-built from 500 lb hollow-core braid, $34.99, with a 130 lb Spro power swivel crimped into each end — one for the main line side, one for the planer side. It’s built specifically to bend around a planer’s body without tangling, which is the whole point: it has to fold flat against the blade on the way out and lay straight again on the way back through the guides.
The quick-release connection. The KINLINK 2.7-inch stainless swivel snap hooks (8-pack, $17.99) are 304 stainless, rated to 110 lb, with a 360-degree swiveling eye. These go on the reel-side end of the bridle, snapping onto the main line’s own swivel so you can switch a planer rod between rigs — or between planer and no planer at all — in seconds without re-tying anything.
The locking connection. The Vmuter 1.5-inch stainless screw-lock quick links (10-pack, $6.49) are 304 stainless, threaded, rated to 175 lb. These go on the planer-side end of the bridle, where it’s a set-once connection you don’t want popping open from wave slap or wire chafe over a full day of trolling — a screw lock stays shut in a way a spring snap isn’t built to guarantee on a joint you’re not opening every trip.
How to rig it
- Snap the bridle to your main line. Clip a KINLINK swivel snap onto one end of the Tackle Room bridle’s built-in Spro swivel, then snap that onto your main line’s own swivel. This is the connection you’ll be opening and closing every time you swap rigs, so it stays a quick-release snap, not a locking link.
- Lock the bridle to the planer. Thread a Vmuter screw-lock quick link through the bridle’s other end swivel and through the planer’s main tow ring, then screw it down tight. This joint gets built once and left alone.
- Rig the leader off the blade ring. Crimp or tie your leader — 100 to 130 lb mono is standard for wahoo, tuna, and kings at slow-troll speeds — to the planer’s second ring, the one mounted on the blade itself, with your bait or lure on the terminal end.
- Lay it out flat before it goes in the water. Stretch the whole rig out — bridle, planer, leader — and check that nothing’s twisted or crossed. A planer that goes in the water already fouled will track wrong or refuse to dive at all.
- Deploy and set. Let the planer out to the side of the wake, let the blade rotate down to its diving angle as it takes line, then set the rod in the holder with the drag where you want it. The planer trips flat on a strike; you’ll feel the rod load up as the tow angle changes.
Bringing it to the boat
This is the part the bridle actually earns its keep on. Reel steadily and keep the rod tip up as the doubled bridle line comes through the guides — it folds flat and passes cleanly where the planer’s own hardware never could. When the Vmuter link at the planer end reaches the rod tip, unclip it in one motion. The planer’s done, and whatever’s on the other end of that leader is now a straight fight on the leader alone, same as it would be without a planer in the picture at all.
What to actually buy
- Planer: BLUEWING trolling planer, $16.99–$39.99 depending on size
- Bridle: Tackle Room Fishing Planer Bridle, 500 lb hollow-core, $34.99
- Quick-release snaps: KINLINK 2.7” stainless swivel snap hooks, 8-pack, $17.99
- Locking quick links: Vmuter 1.5” stainless screw-lock quick links, 10-pack, $6.49
Bottom line
A direct-tie planer works, but it turns every hookup into a wrestling match at the rail. Add a real bridle — soft hollow-core braid, a quick-release snap on the reel side, a locked connection on the planer side — and the whole rig reels to the rod tip like anything else on the boat. Build it once with the right parts and it’s a five-minute rig job every trip after that.
This article may contain affiliate links. If you buy through them, we may earn a small commission at no extra cost to you. Learn more.